Introduction
WebScan is the software that enables instant detection of illegal video copies on video-sharing platforms. WebScan is based on WebKyte’s proprietary digital video fingerprinting technology.
Video fingerprinting is the technology that extracts distinctive elements of a video into a unique line of code, a fingerprint. This technology has demonstrated its efficiency in identifying and comparing video files at scale. Video fingerprints are irreversible to original files and fully secure.
To run copy detection for a video on WebScan you should prepare and upload a digital fingerprint of the video to the WebScan data server. This guide covers every step of this process.
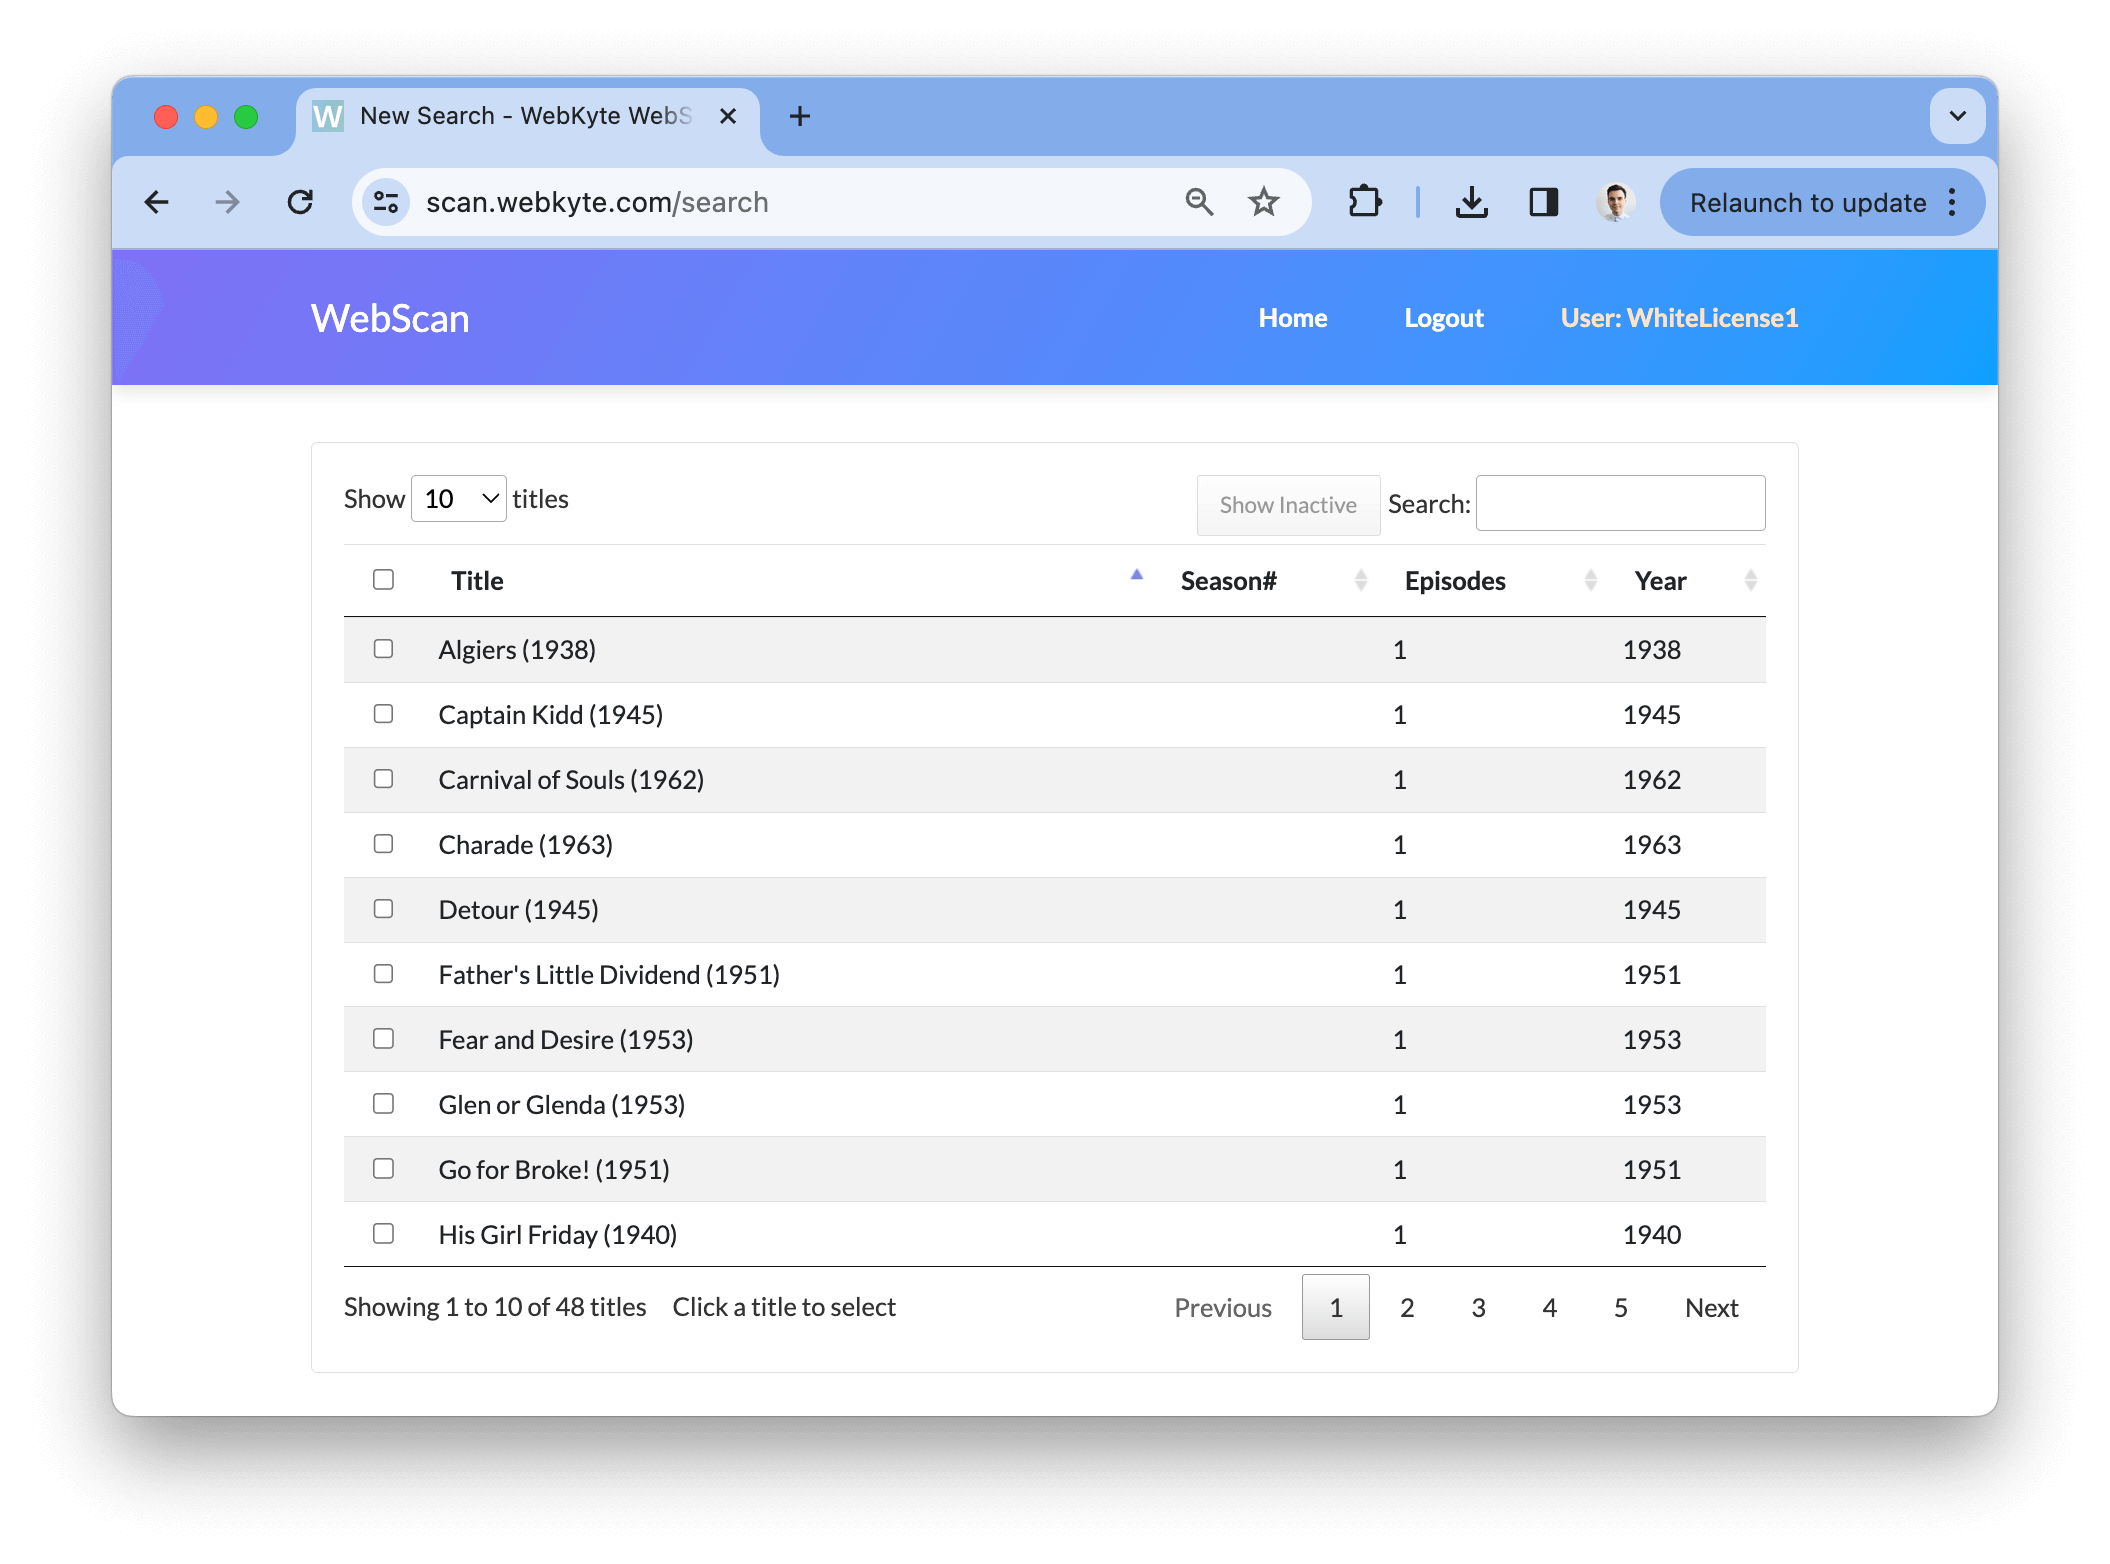
Once uploaded, your titles will be available for copy identification on WebScan:
- If you have any questions about WebScan please feel free to reach out to us via [email protected]
Step 1. Prerequisites
To generate fingerprints locally, the WebKyte team has prepared a Docker image. Therefore, the script from step 3 requires Docker to be installed in order to run.
Please install and set up Docker following this instruction:
For Ubuntu
https://docs.docker.com/engine/install/ubuntu/
For Windows
https://docs.docker.com/desktop/install/windows-install/
Step 2. How to generate one fingerprint
In this step, we use a Docker container to generate fingerprints for a specific video file. This process involves analyzing the video and extracting its unique features to create a digital fingerprint.
To start, install Docker on your system and store the video file in the directory specified by
/path/to/video/storage. Likewise, the directory specified by /path/to/fp/storage is where the generated fingerprints will be stored.
Use the following command to execute the Docker container:
docker run \
    --rm \
    -v /path/to/video/storage:/videos:ro \
    -v /path/to/fp/storage:/fingerprints \
    registry.clients.webkontrol.com/wk-fingerprint /videos/video.mp4 /fingerprints/fingerprint.fp
This command mounts both the video storage and fingerprint storage directories volumes inside the container. The command then runs the registry.clients.webkontrol.com/wk-fingerprint image and passes both the input video file and the output fingerprint file paths as arguments.
By using read-only volumes (ro), we ensure that the original files remain untouched and secure, while the container can access the necessary data to complete the fingerprinting process.
On the first call, the Docker image is pulled from the WebKyte docker-registry, and subsequently, the cached image is used.
Example:
docker run \
    --rm \
    -v /home/testuser:/videos:ro \
    -v /home/testuser:/fingerprints \
    registry.clients.webkontrol.com/wk-fingerprint /videos/video.mp4 /fingerprints/fingerprint.fp
Example description:
/home/testuser folder is mounted as read-only video storage to /videos folder inside the docker container file system.
/home/testuser folder is mounted as fingerprints storage to /fingerprints folder inside the docker container file system.
/videos/video.mp4 is an input video file. Originally it is located at /home/testuser. On the docker filesystem, it is located in the /videos folder.
/fingerprints/fingerprint.fp is an output fingerprint file. After creation, it can be found in the /home/testuser folder.
To upload prepared fingerprints to WebScan servers, send a POST request to the endpoint https://scan.webkontrol.com/v2/upload/<client_video_id>
POST
https://scan.webkontrol.com/api/upload/’client_video_id’
You should provide a unique string ID for each uploaded fingerprint.
Authorization
Authorization is performed by a token in the request header: Authorization: Token ‘token’
| Make sure to check your inbox to get the token. |
Data
Valid fingerprint in the request body
| Parameter | Description |
|---|---|
| title | the official title of the content |
| year | release year |
| type | content type: 0 - movie, 1 - TV series |
| season | season number (if type = 1) |
| episode | episode number (if type = 1) |
| other | any other information in the arbitrary format (optional parameter) |
Parameters:
Parameter
Description
title
the official title of the content
year
release year
type
content type: 0 – movie, 1 – TV series
season
season number (if type = 1)
episode
episode number (if type = 1)
other
any other information in the arbitrary format (optional parameter)
Responses:
Code
Description
200
Success
400
Invalid request — empty request body, invalid file
401
Unauthorized, invalid token
409
Conflict, something has already been successfully uploaded with the same ID
Usage example:
curl "https://scan.webkontrol.com/api/upload/my_first_fp?type=1&title=My%20First%20FP&year=2023&season=1&episode=1&other=Other%20Info" \
  -X POST \
  -H "Authorization: Token <token>" \
  --data-binary "@fingerprint.fp"
Step 3. Prepare your files & metadata for bulk upload
The fingerprint upload process consists of two steps. The first step involves fingerprinting videos and storing the generated fingerprints on your device. The second step entails uploading the fingerprints to WebScan.
Before you can run the script, there are three things you need to prepare: a folder with video files, metadata, and a folder for fingerprints.
1. Folders for video files and fingerprints
Open the terminal and follow these steps:
# create a wk directory
$ mkdir wk

# go to the wk directory
$ cd wk

# create two more directories
$ mkdir videos
$ mkdir fingerprints- You can keep the video files in their original folder. In this case, make sure to add the full path to the folder with files when running the script in step 3.
2. Video files
Please add all the videos you want to fingerprint to the videos folder. This folder has read-only access so your original files stay in your system throughout the whole process.
Supported formats
Uploader supports all the main video formats: MP4, MOV, MKV, WMV, AVI, and others.
Use clear files
Make sure there are no watermarks, tech specs, or other alien elements in video files. It helps to generate the most accurate digital fingerprints.
- When using the WebKyte script, you do not share video files with us. The entire process of fingerprint generation occurs solely on your side. Only the prepared fingerprints are sent to the WebScan server.
3. Metadata
To connect a fingerprint to a specific title in the WebScan interface, it is essential to supply metadata.
Please add a file named upload.csv containing metadata to the wk folder.
When preparing a CSV file, please use this format and ensure there are no typos:
video1.mp4,Algiers,1938,0
video2.mp4,Captain Kidd,1945,0
video3.avi,First of Us,2023,1,1,1
video4.avi,First of Us,2023,1,1,2- The 1st value is the video file name (for example, video3.avi)
- The 2nd value is an official title (for example, First of us)
- The 3rd value is the year of release (for example, 2023)
- The 4th value is a type (0 for a movie, 1 for a series)
- The 5th value is a season number (only for series)
- The 6th value is an episode number (only for series)
All the values should be divided by a comma with no additional spaces.
Each title’s metadata should be on a separate row in the CSV file.
Step 4. Run the script to upload multiple fingerprins
1. Download the script upload.sh to the wk folder and make the script executable:
# Download the script
$ curl -sqL bit.ly/WKupload > upload.sh

# Make the script executable
$ chmod +x upload.sh
Full script text:
shopt -s extglob
while IFS="," read -r col1 col2 col3 col4 col5 col6
do
 echo "++++++++++++++++++++++++++++++++++++++++++++++++++++++++++++"
 echo "Processing file started: $col1"
 echo ""

 echo "Video file: $col1"
 echo "Title: $col2"
 echo "Year: $col3"
 echo "Type: $col4"
 echo "Season: $col5"
 echo "Episode: $col6"
 echo ""

 echo "Fingerprinting started"

 docker run --rm -v $3:/videos:ro -v $4:/fingerprints registry.clients.webkontrol.com/wk-fingerprint /videos/$col1 /fingerprints/$col1.fp

 echo "Fingerprinting finished"
 echo ""

 if [ "$col4" == "0" ]; then
   id="${col2//+( )/_}_y${col3}"
   echo "Uploading id: $id"

   url="https://scan.webkontrol.com/api/upload/$id?type=0&title=${col2//+( )/%20}&year=$col3"
   echo "Uploading url: $url"

 else
   id="${col2//+( )/_}_y${col3}_s${col5}_e${col6}"
   echo "Uploading id: $id"

   url="https://scan.webkontrol.com/api/upload/$id?type=1&title=${col2//+( )/%20}&year=$col3&season=$col5&episode=$col6"
   echo "Uploading url: $url"
 fi

 echo "Uploading started"

 curl "$url" \
 -X POST \
 -H "Authorization: Token $1" \
 --data-binary "@$4/$col1.fp"

 echo "Uploading finished"
 echo ""

 echo "Processing file finished: $col1"
 echo "------------------------------------------------------------"
 echo ""

done < $2
2. View the contents of the directory. You should see the following files and sub-directories:
├── wk
│ ├── fingerprints
│ ├── upload.csv
│ ├── upload.sh
│ ├── videos
│    ├── video1.mp4
│    ├── video2.mp4
│    ├── video3.avi
│    ├── video4.avi
3. Run the script:
# Run the script
$ ./upload.sh <TOKEN> upload.csv /full/path/to/videos/directory /full/path/to/fingerprints/directory- 1. Make sure to enter the full path to both the folder with video files and the folder for fingerprints
-
2. Replace
with your personal token. You can find it in your inbox.
Here is an example:
./upload.sh f1e6c0c19b1b7556a49ab7aed02549486b3d89 upload.csv /home/desktop/wk/videos /home/desktop/wk/fingerprints4. Wait for the script to finish processing files.
How to use the script for new titles. Once you have the new titles released, you can upload them to WebScan with the same script.
1. Add new video files to the videos folder
2. Update the upload.csv file so it contains only metadata for the new titles
3. Run the script again
Step 5. Scan the platforms
Once the fingerprints are successfully uploaded to WebScan, you can run copy detection for your titles.
-
Before you start: make sure to whitelist your official channels.
Email us the links to your official channels on Dailymotion, Vimeo, and other supported platforms to keep them out of matching results.
1. Go to https://scan.webkyte.com/ and log in to your account:
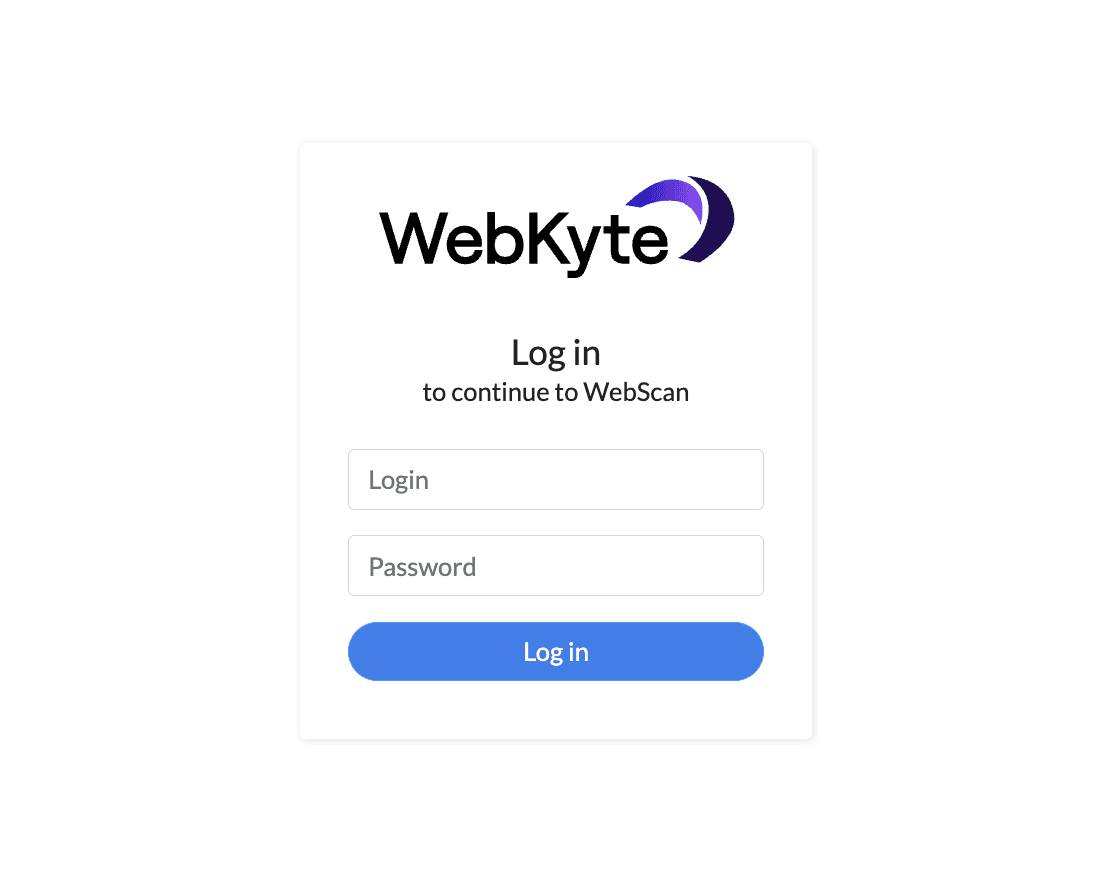
- Make sure to check your inbox to find your Login and Password
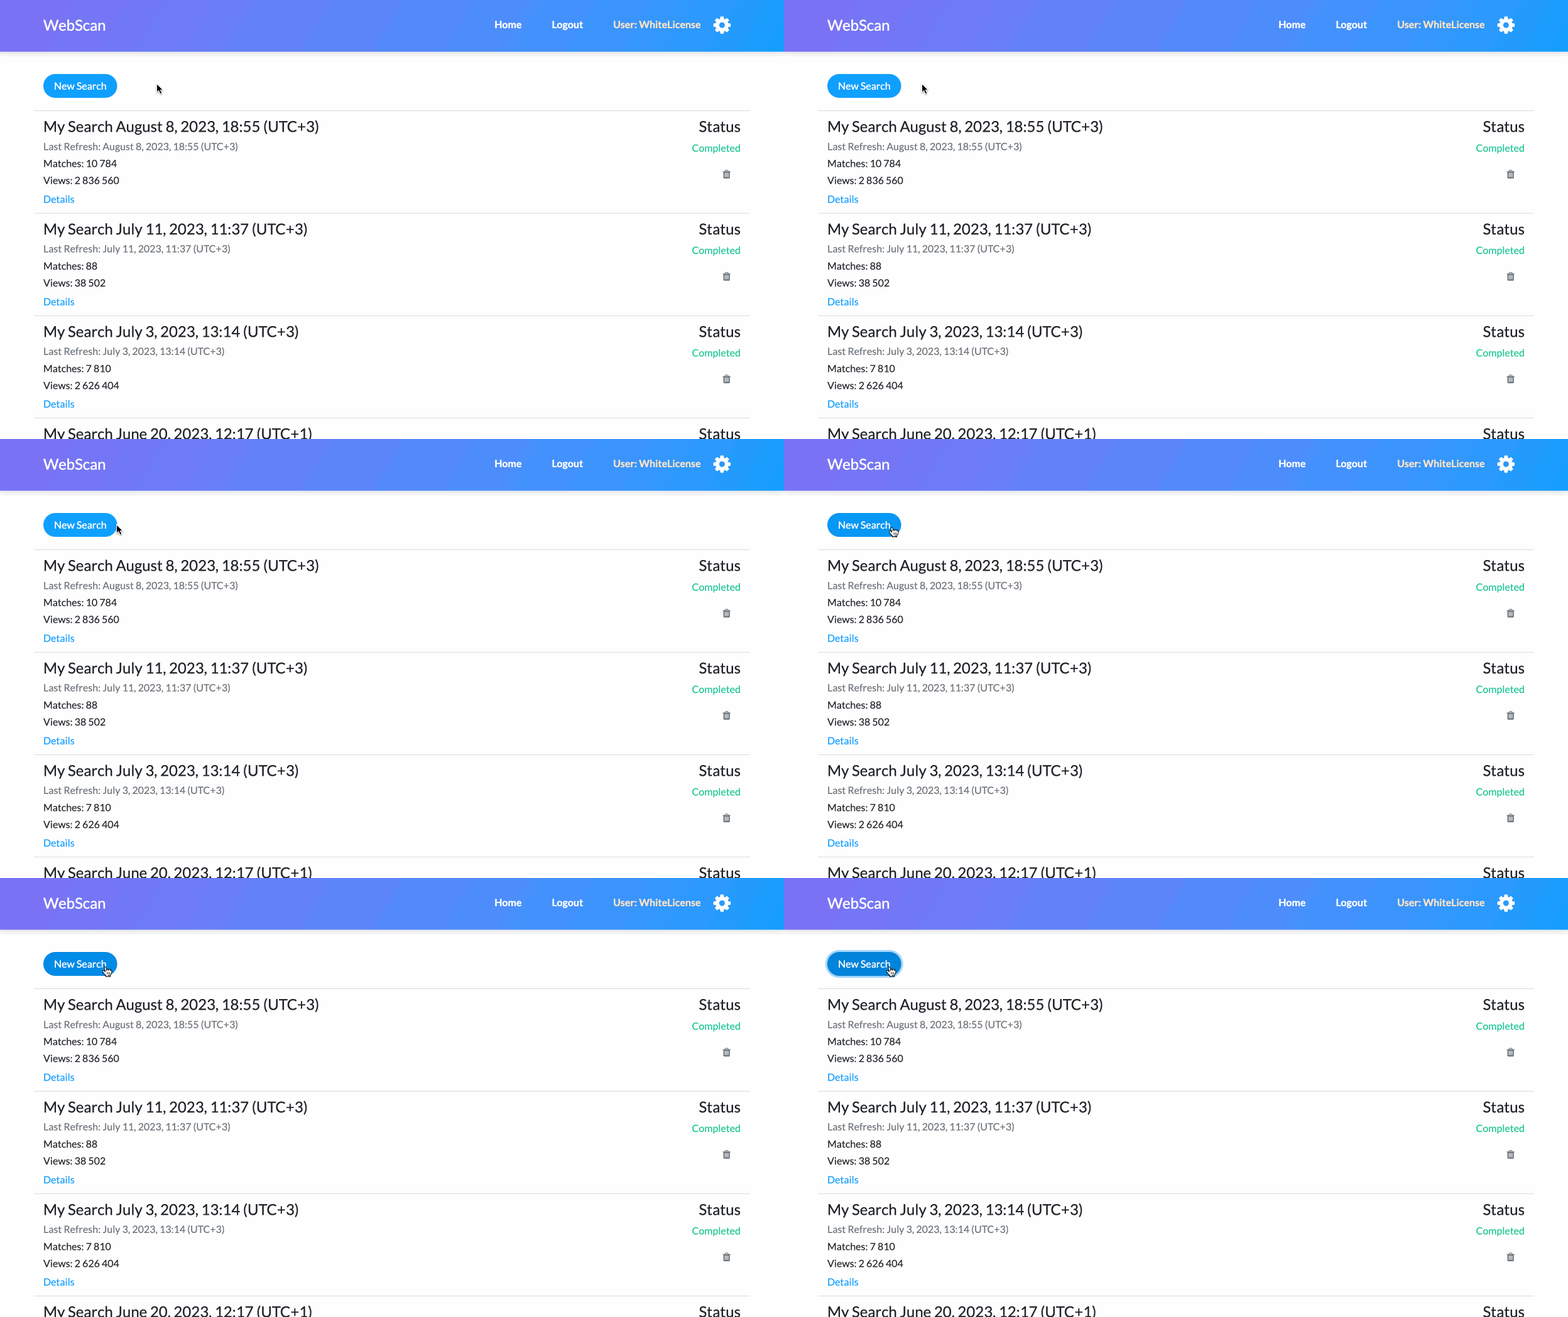
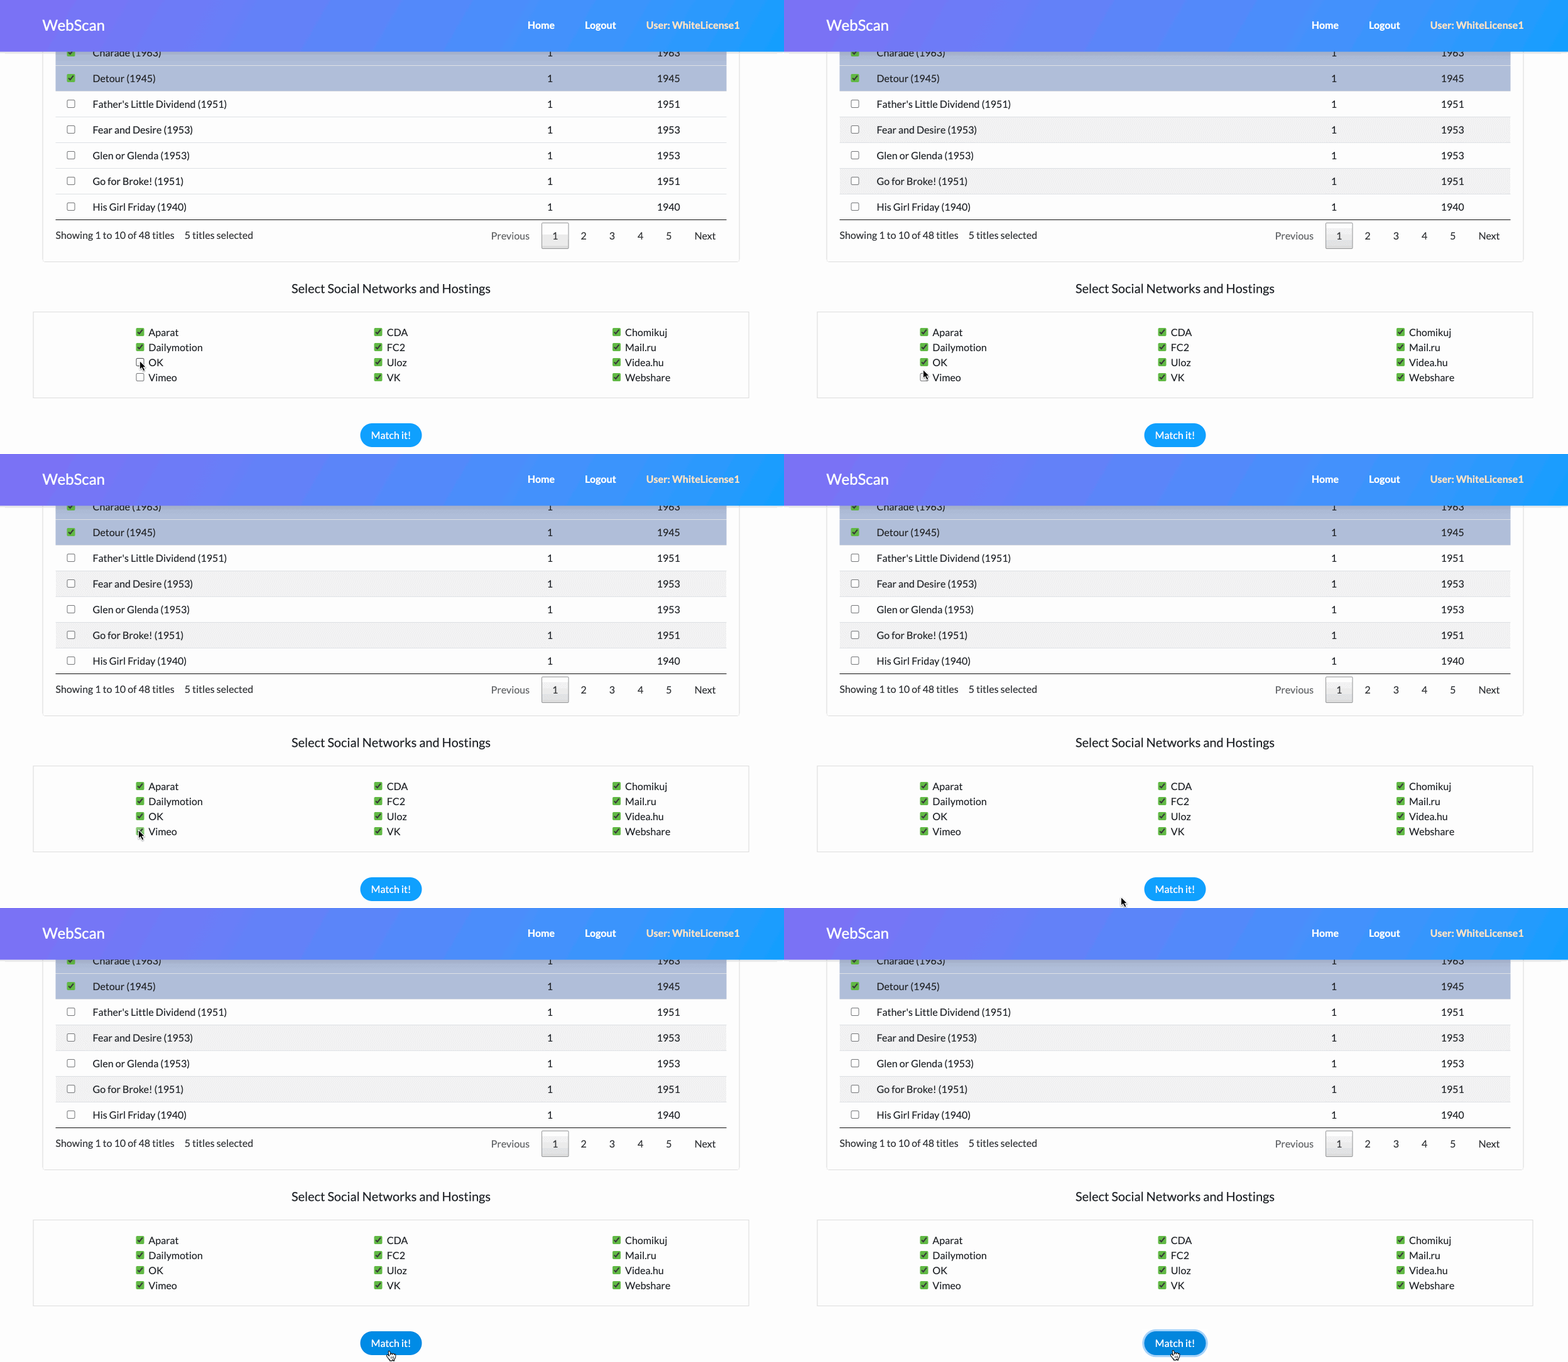
2. Click New Search
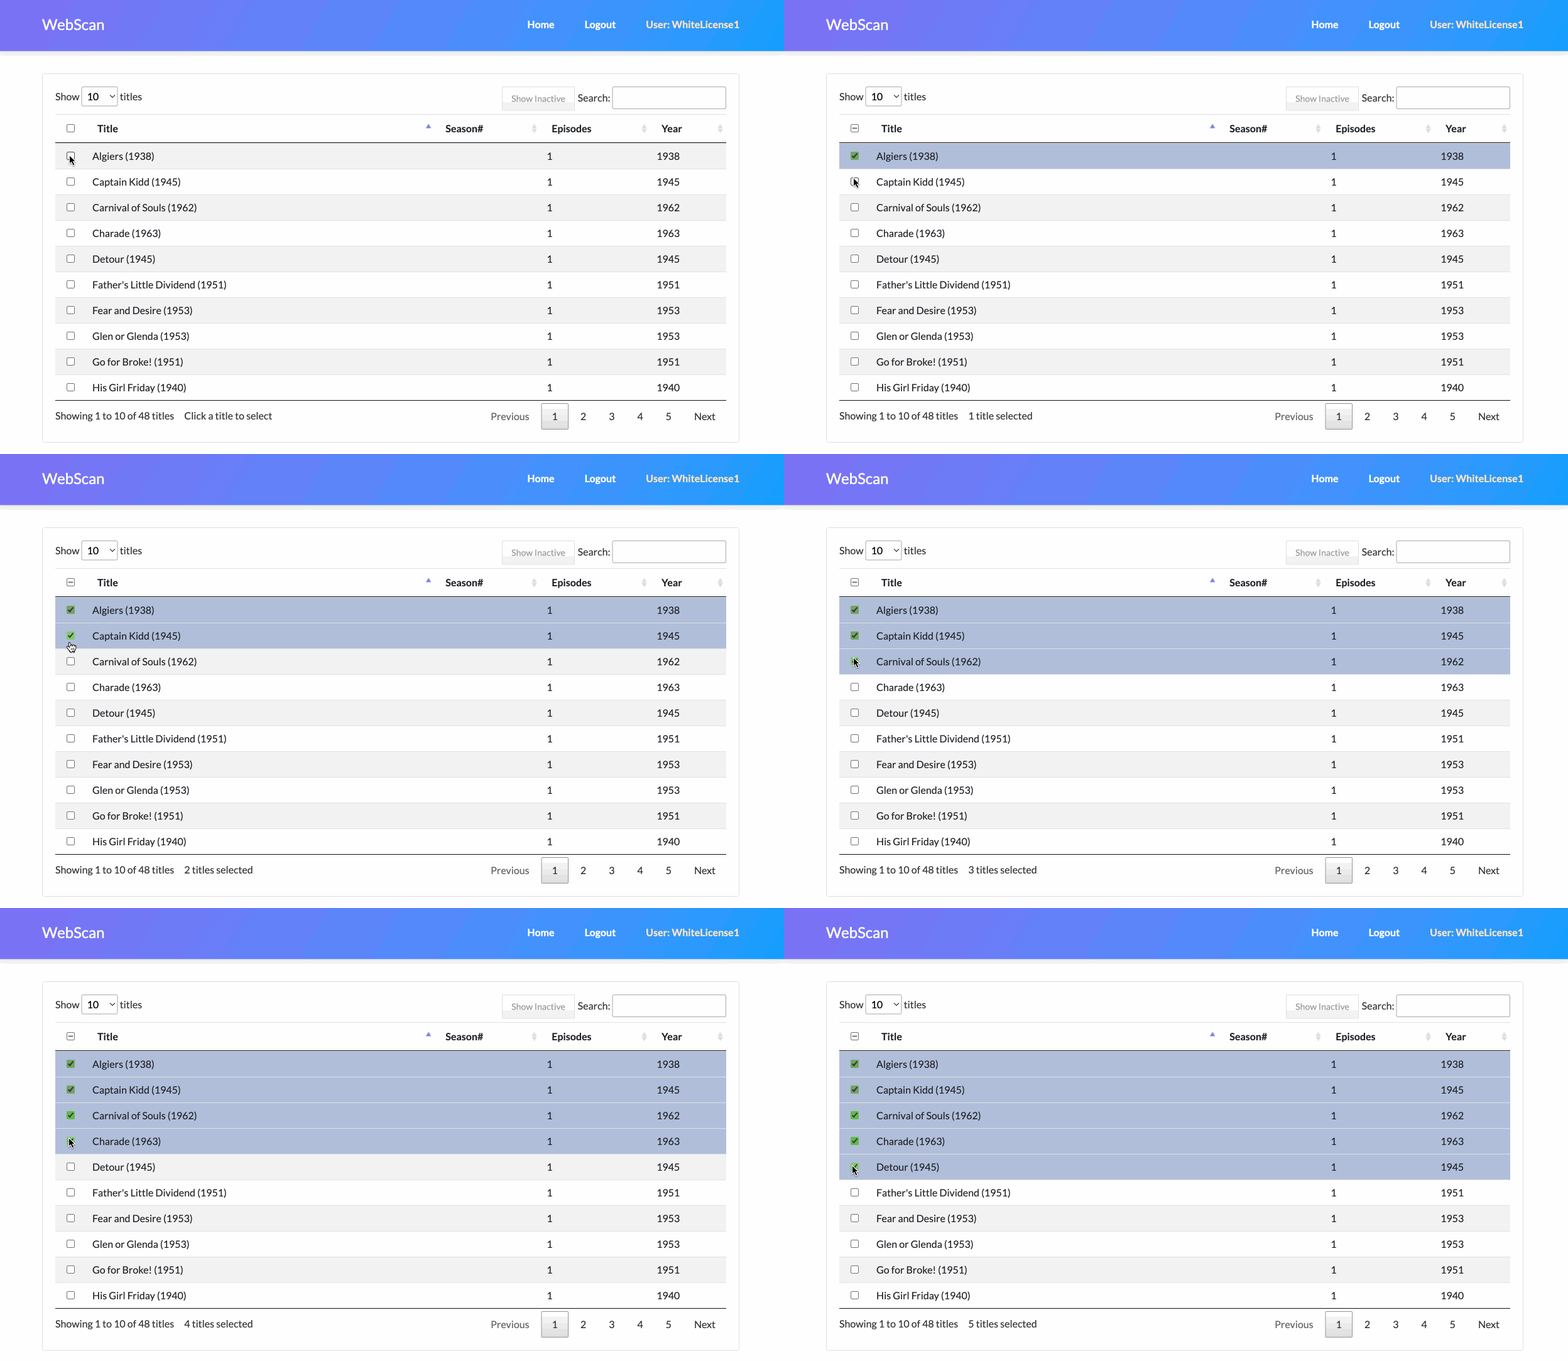
3. Select titles your want to check for copies
4. Select the platforms and click Match it! to start scanning:
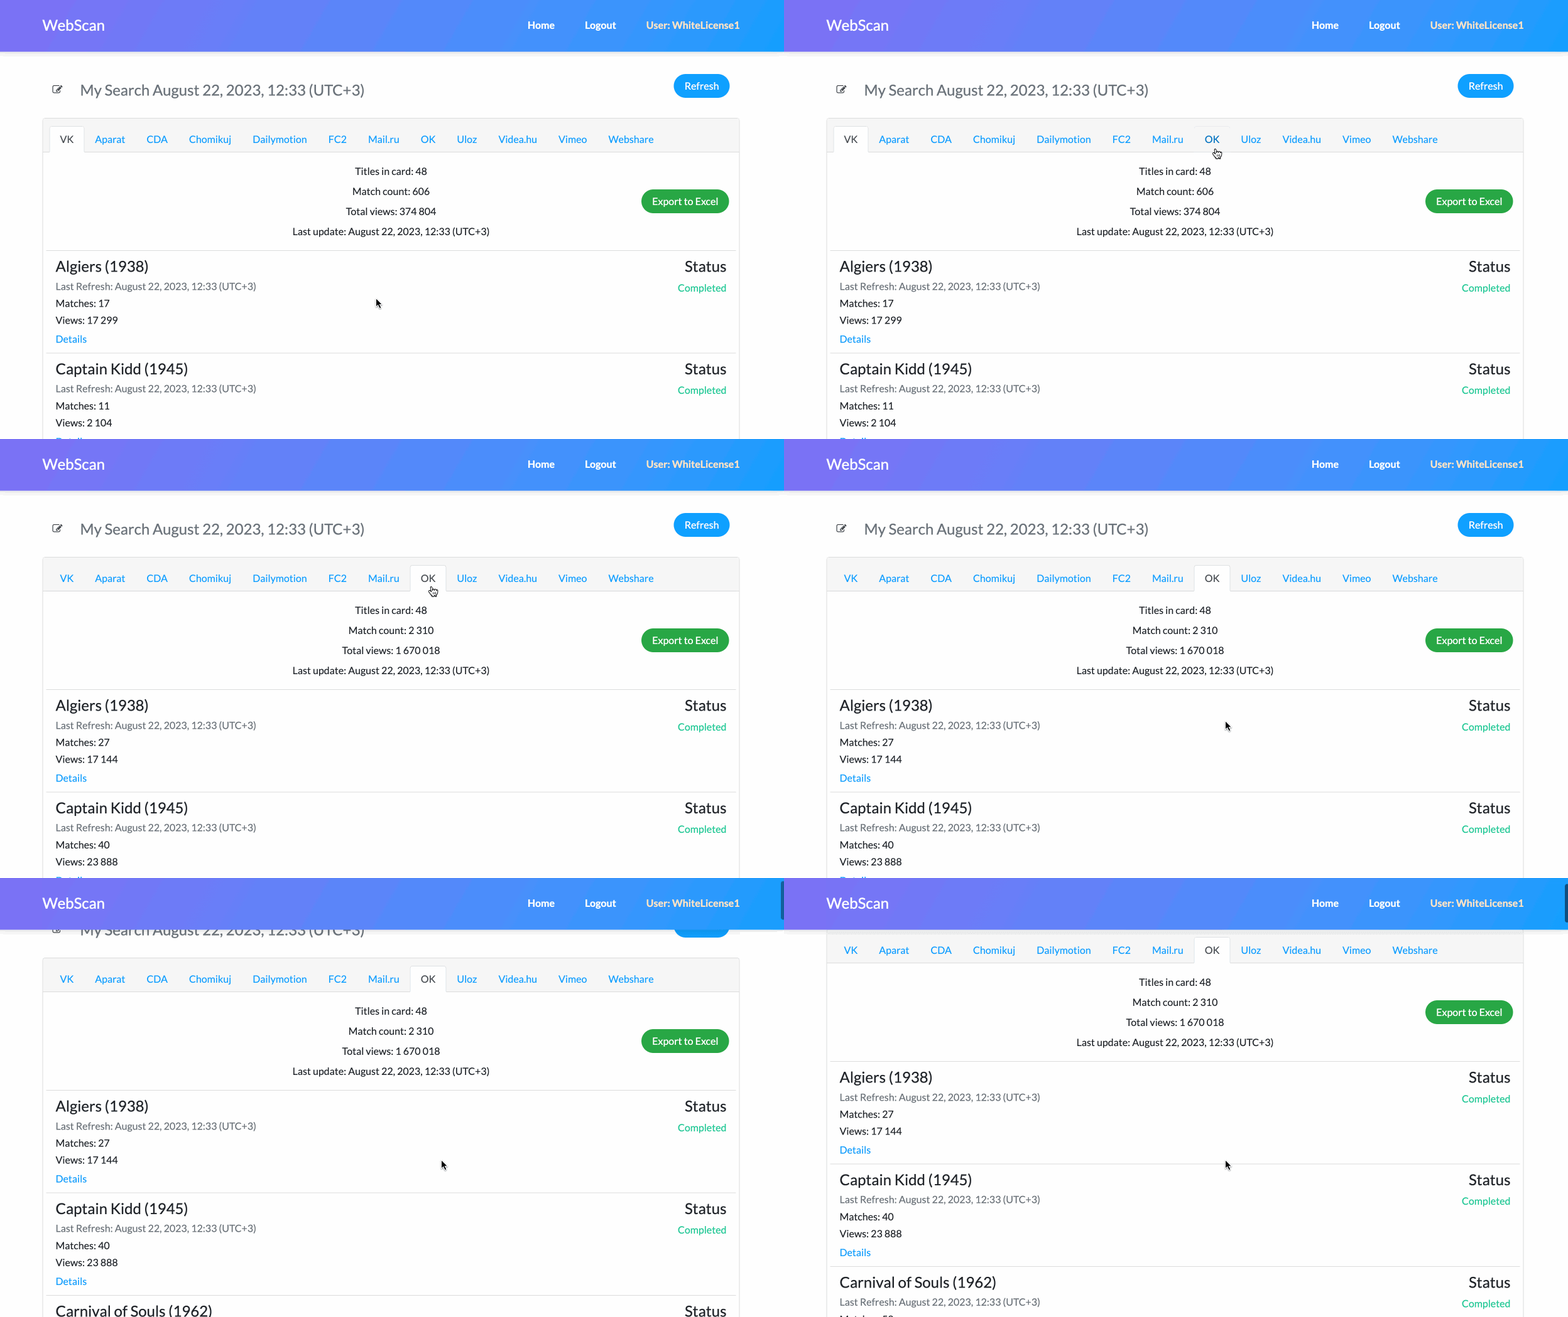
5. Wait for the status to be «Completed» and explore the matching results:
- If you have any questions about WebScan please feel free to reach out to us via [email protected]